Tutorial: Bottle Lamp with Galaxy Print Shade

June 27, 2015

Tutorial: Bottle Lamp with Galaxy Print Shade - Read about DIY lampshade kits and projects at http://ilikethatlamp.com

a

a

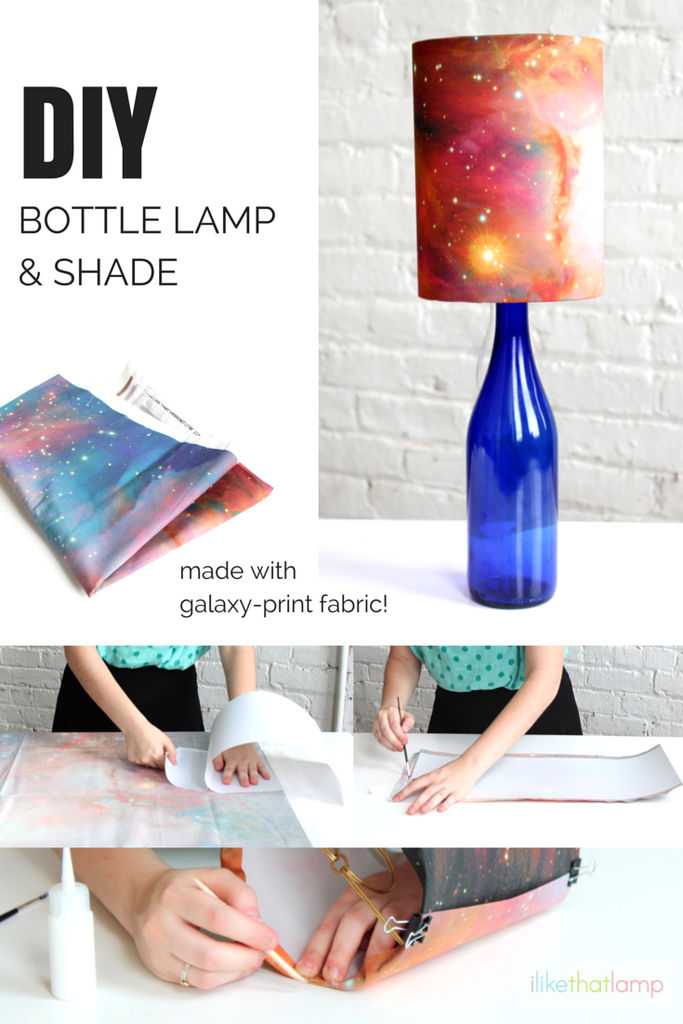
We're starry-eyed for Galaxy and Space themed home decor right now! So after finishing a DIY wine bottle lamp last week, we decided to outfit it with a coordinating lampshade in a cool Orion Nebula Galaxy print from Spoonflower. For the uninitiated, Spoonflower is a marketplace of incredible digitally printed fabric and wallpaper, designed by their own community. You can even design your own fabric prints for projects! There are several fabric material options available, but we chose the inexpensive 'Basic Cotton Ultra' which worked a charm for this project.


Here's how we did it!


Tutorial: Bottle Lamp with Galaxy Print Shade - Read about DIY lampshade kits and projects at http://ilikethatlamp.com


Materials needed


  • DIY Lampshade Making Supplies (or an all-in-one bottle lamp & shade kit if making both the bottle lamp and shade together)

  • Cotton fabric. For a 8" high x 6" diameter shade, you'll need a length of at least 21" x 9"

  • Scissors, or rotary cutter & mat

  • An old paintbrush (optional)

  • A completed bottle lamp

Project steps


Tutorial: Bottle Lamp with Galaxy Print Shade - Read about DIY lampshade kits and projects at http://ilikethatlamp.com


How to make a DIY coordinating lampshade for a wine or liquor bottle lamp base | ilikethatlamp.com

  1. Lay your fabric down flat on the table with the reverse side facing up. Take the adhesive styrene included in the Lampshade Kit and peel back a small section of the backing. Carefully stick the styrene to the desired section of your fabric, slowly peeling away more and more of the backing while keeping the fabric underneath tight and flat.

  2. Trim away the fabric from the styrene, leaving a 1/2" allowance around each of the sides, except for one of the short sides which is trimmed flush with the edge of the styrene. Use the lampshade glue from the kit and a paintbrush (or the nozzle of the glue bottle) to glue down the fabric on the short edge - this creates a neat seam on the finished shade.

  3. Roll the shade into a cylinder, with the neat 'seam' edge on the outside of the cylinder. Use the binder clips in the kit to hold it in place. Insert the top lampshade ring into the cylinder and use more clips the hold the ring flush with the styrene.

  4. Working in sections, apply some lampshade glue to the overhanging fabric and spread it around with a paintbrush or the nozzle. Once tacky, fold the fabric over the lampshade rings and use the wooden tool the tuck the fabric up behind the rings for a neat 'rolled edge' finish.

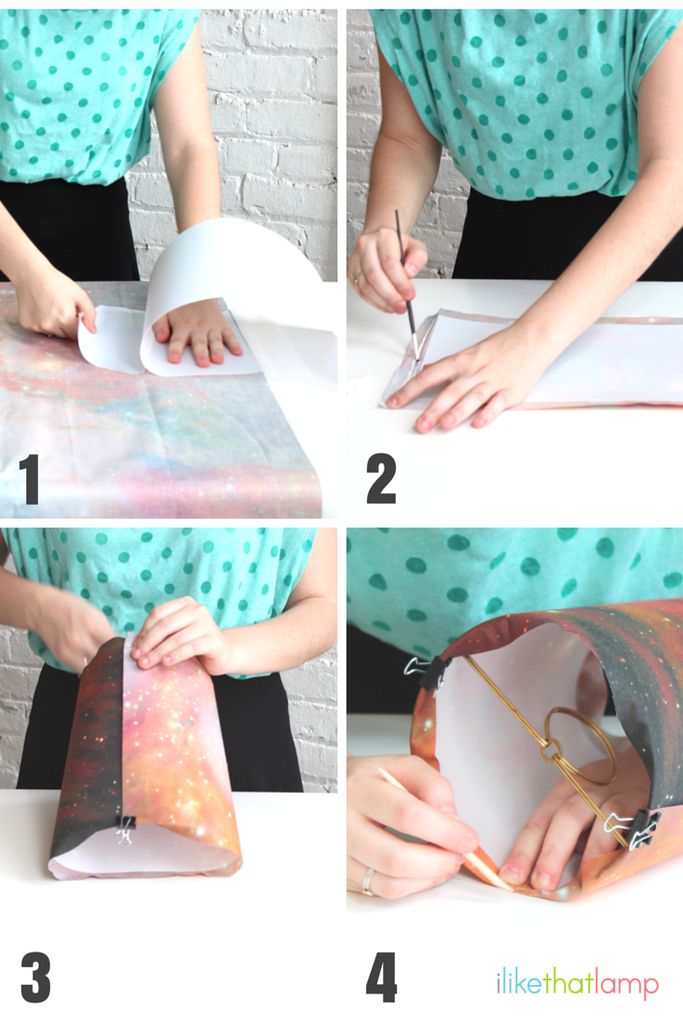
Do the same for the bottom lampshade ring. To finish off, apply some glue under the side 'seam' to keep it flat.


The finished lamp


Tutorial: Bottle Lamp with Galaxy Print Shade - Read about DIY lampshade kits and projects at http://ilikethatlamp.com


Make a DIY bottle lamp with a matching lamp shade


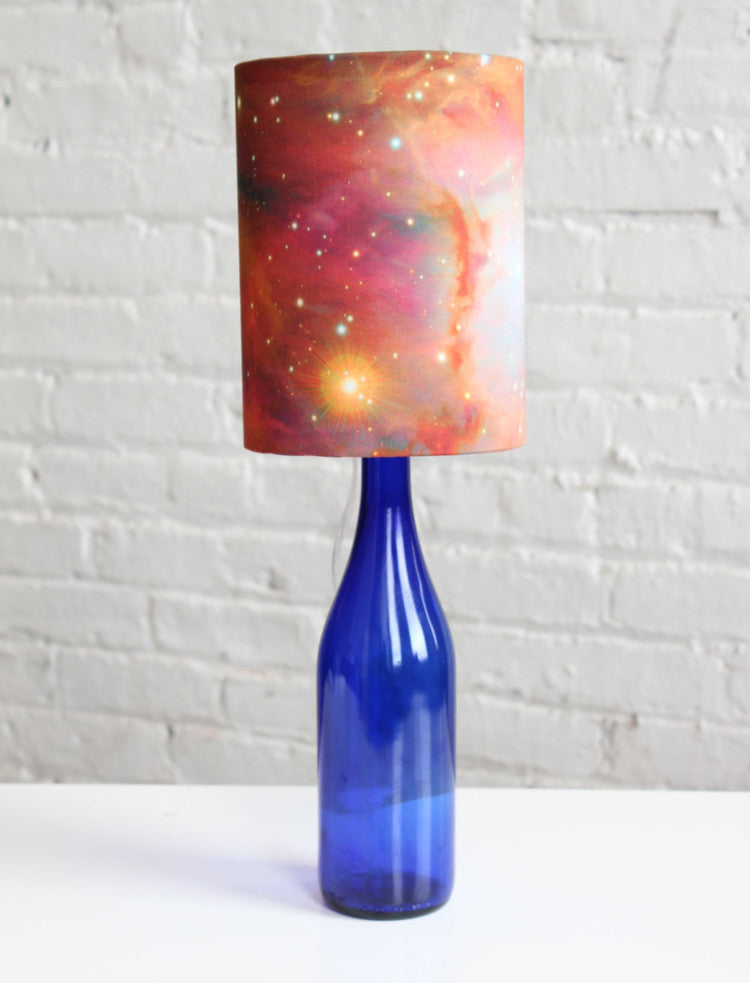
We love how the orange hues in this print create a perfect contrast to the glossy royal blue of the bottle lamp base!

Check out the tutorial on how to make a bottle lamp to see how we created the base.
 

Shop the supplies

http://www.ilikethatlamp.com/product/bottle-lamp-shade-kit


Leave a comment